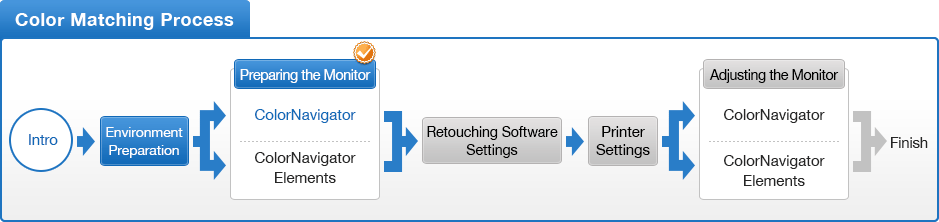
How to Color Match Your ColorEdge Monitor and Photo Prints
Monitor Adjustment - ColorNavigator
The ColorEdge CG Series, CX and CS Series’ CNX models include ColorNavigator software, which allows accurate calibration in a short amount of time. Let’s adjust the monitor to match the ambient lighting using ColorNavigator and the calibration sensor that it supports.
- It is possible to use a commercially available external calibration sensor with general calibration software, but when calibrating your ColorEdge monitor using ColorNavigator you can achieve a much higher precision calibration.
Preparing the Monitor
1. Connect the cables
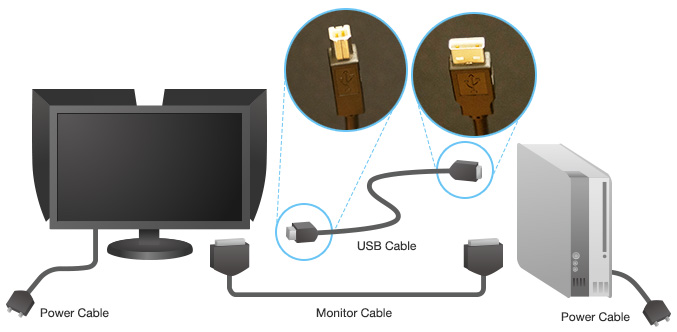
- Connect your ColorEdge and the computer to the power using the power cables
- Connect your ColorEdge to the computer via the monitor cable
- Connect your ColorEdge to the computer via the USB cable*
- When connecting your ColorEdge using the USB cable, make sure it is plugged in properly. Insert the upstream square tip into the ColorEdge, and the downstream rectangular tip into the computer.
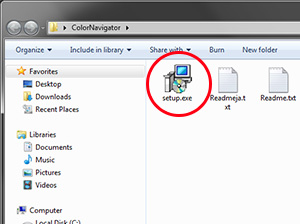
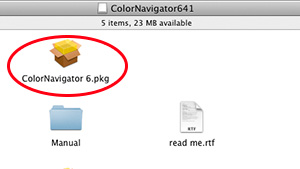
2. Install ColorNavigator to the Computer
Make sure your computer’s power is connected, insert the EIZO LCD Utility Disc CD-ROM, and choose Install ColorNavigator.
You can also download the latest version of ColorNavigator from the EIZO web site.
|
For Windows |
After extracting the file, double click on Setup.exe if you are using Windows, or ColorNavigator 6.pkg if you are using Mac to begin the installation. |
|
For Mac |
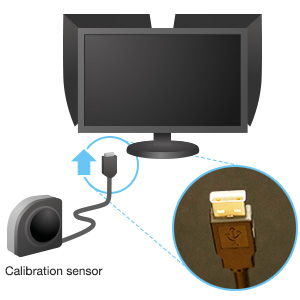
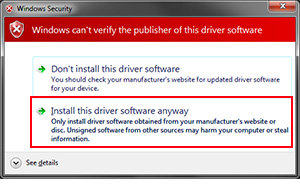
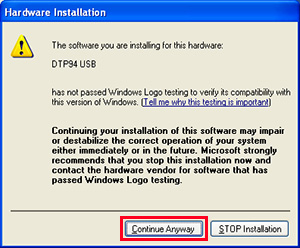
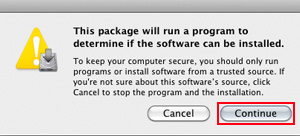
3. Connect the Calibration Sensor
|
|
When using an external calibration sensor, connect the sensor to the downstream port of your ColorEdge monitor.
|
|
|
The calibration sensor drive will install automatically. If you see this screen, please continue the installation. |
|
For Windows XP |
|
|
For Mac |
Recommended Process
- This guide refers to the latest version of ColorNavigator. It may differ from older versions.
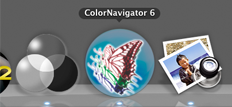
1. Launch ColorNavigator
-
For Mac, double click on the butterfly icon on the Dock.
If the icon does not appear on the Dock, navigate using the following:
Finder > Applications > Double click on the ColorNavigator 6 icon
-
For Windows, double click on the butterfly icon shortcut on the desktop.
If the shortcut is not showing, navigate through the following:
Start Menu > All Programs > EIZO Folder > Click on Color Navigator 6
|
For Mac |
For Windows |
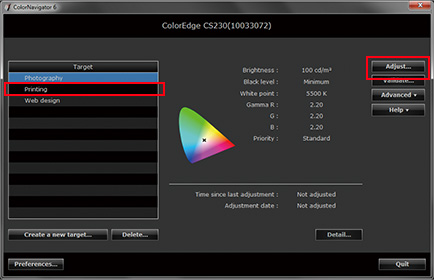
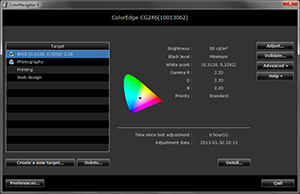
2. Select Adjustment Target
|
|
Three preset adjustment targets are provided with appropriate values set for the intended use of the monitor.
|
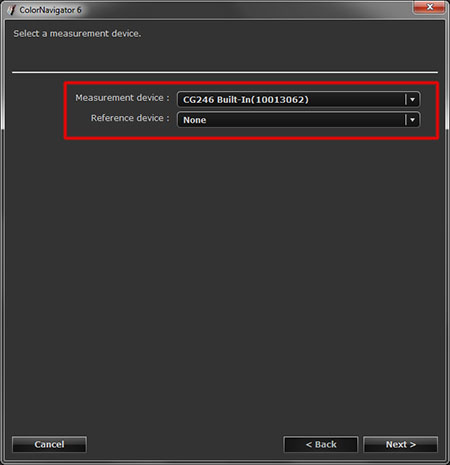
3. Select the Calibration Sensor
Select the calibration sensor to use.
|
 |
|

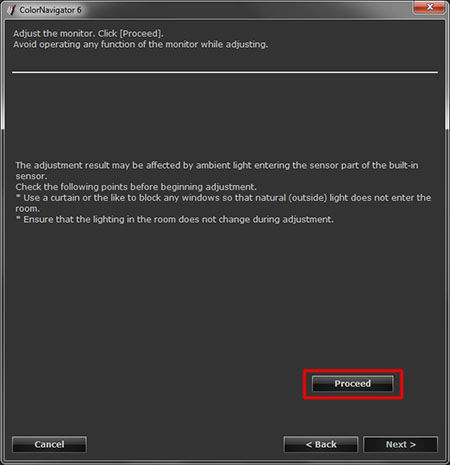
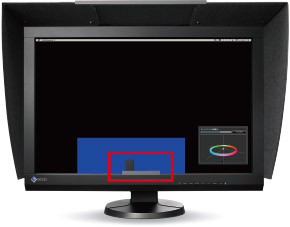
4. Proceed with the Calibration
|
 |
|
||||||||||||||

5. Display the Results
|
|
The adjustment process is now complete. When the results of the adjustment have been displayed, confirm that there are no major gaps between the target values and the results. This concludes our guide to monitor adjustment basics. In order to match the colors between your monitor and photo prints, open your photos in your retouching software and print. It is also important to properly adjust the settings of your retouching software and printer. Let’s check for the correct settings. |
![Before opening your photos, set your retouching software [Retouching Software Settings]](http://www.eizoglobal.com/library/management/matching/calibration/btn_04.gif)
When Measuring Paper White
We will introduce a different method to achieving color matching. With this method, we will show you how to measure the white of your printer paper using an external commercial calibration sensor. We will then use the results to adjust the monitor.
- The built-in internal calibration sensor cannot perform paper white measurement. If you use this method, please prepare a separate external calibration sensor.
1. Launch ColorNavigator
|
For Mac |
For Windows |
2. Select Create a new target on the lower left side of the menu

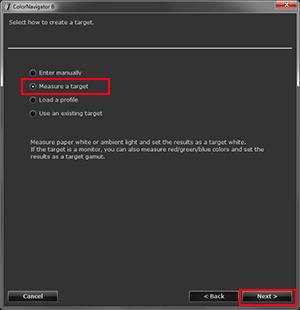
3. Select the target creation method
|
|
To measure the white of your paper and adjust your monitor to those values, select “Measure a target,” the second option from the top. |
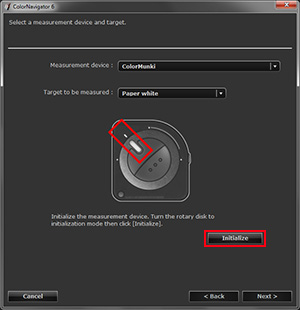
4. Select the Measurement device and Target to be measured.
|
|
Select the calibration sensor that you are using. For Target, select “Paper white ” and follow the instructions to format the sensor.
|
5. Measuring the Paper White
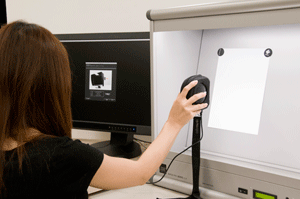
|
|
Measure the paper while referring to the image displayed in the menu. Hold the sensor in place on the area of the paper where the photo would be printed, distance the sensor from the paper by approximately 25cm, and click the “Measure” button. Once measurement is taken, XYZ, Brightness, and Coordinate values will change. After the measurement is completed, click “Next.” |

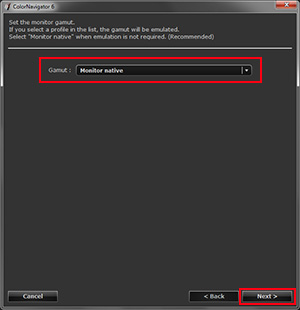
6. Select Color Reproduction
|
|
A Color Reproduction window will appear for models that support a wide color gamut. In order to apply the maximum color gamut of your ColorEdge monitor, select “Monitor native” and click “Next.” |
7. Confirm Brightness and White Point
|
|
Do not make any changes to the brightness or white balance (white point) measured previously and click “Next.” The brightness in which you see a photo print indoors in the evening is equivalent to 80 cd/m2~100 cd/m2 on the monitor. Confirm that the value is not far off from this target and continue. |

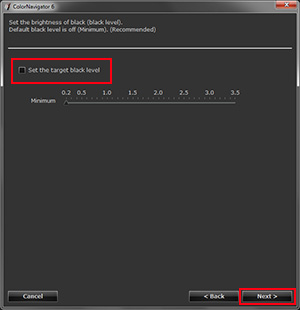
8. Leave the black brightness level settings box unchecked and click “Next”
|
|
Leave the “Set the target black level” box unchecked and click “Next”. If the monitor’s contrast is too strong compared to the test print, you can adjust the black level to increase the accuracy of your match. |
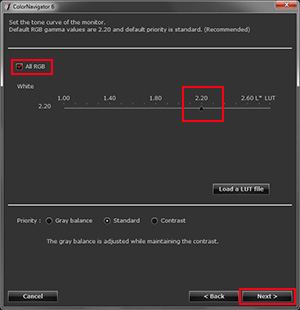
9. Set the tone curve
|
|
In order to display the monitor’s highest level of performance, check “All RGB”, set the gamma to 2.20, and choose “Standard” for “Priority”. While it improves contrast, it will also adjust the gray balance. Click “Next”. |
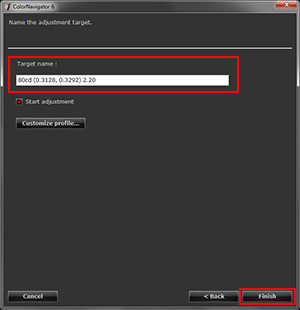
10. Complete Creation of Target
|
|
Specify the name of the adjustment target or you can leave it as the default. The default option will list the brightness, white point, and gamma. When you have made your specifications, click “Finish”. |
11. Begin Calibration
|
|
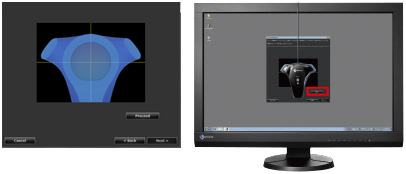
Attach the sensor to the monitor, click “Adjust”, and the calibration will start. |
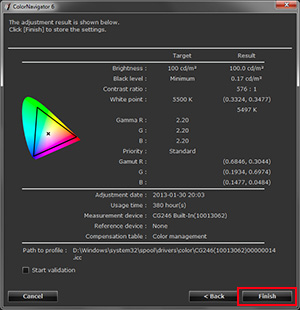
12. Results
|
|
When the adjustment results are displayed, make sure there are no large gaps between the target and the resulting values, and then click “Finish.” |
 |
Return to the main menu and a new option showing the results of the adjustment will be displayed. |

13. Confirm the Results
So far in this guide we have calibrated in an appropriately lit environment so that the images displayed on your monitor and the color of your printer paper are closely matched. In order to confirm that the whites do match, display a white screen, magnify to the same size of your paper, and compare your screen side by side with the paper.
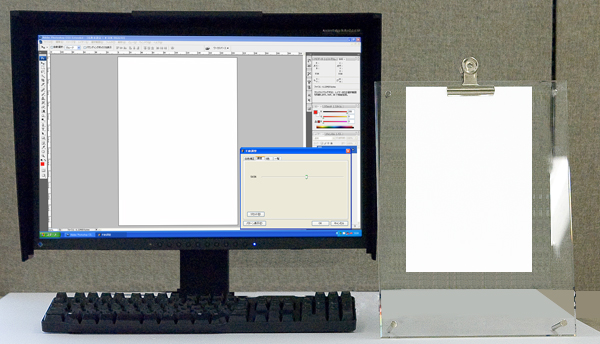
- When comparing the colors, it is important that the sizes match. If the sizes differ, they will appear to look different and will prevent an accurate comparison.
To match the color of your monitor and photos, it is important to also correctly adjust image retouching software and printer settings.
Let’s check for the correct settings.
- You can use the above map to return to any section of this guide.