How to Color Match Your ColorEdge Monitor and Photo Prints
Windows x EPSON x Photoshop Elements 11
How to set your printer
| OS | Printer | Image Software |
|---|---|---|
| Windows 7 | EPSON Expression Series | Adobe Photoshop Elements 11 |
1. In Adobe Photoshop Elements, go to File > Print.

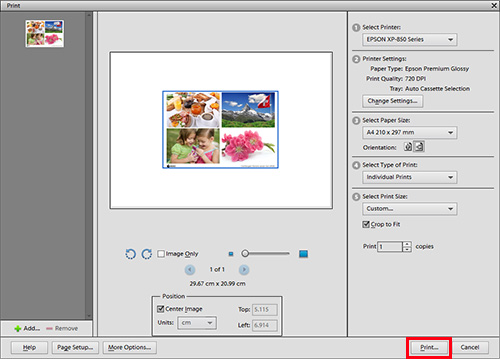
2. In the Print Settings window, choose your printer under Select Printer. Click More Options on the lower left.

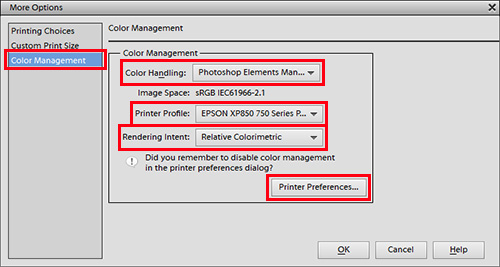
3. In the More Options window, select the Color Management tab. For Color Handling, select Photoshop Elements Manages Colors. Under Printer Profile, select the paper profile you will be using and for Rendering Intent, select Relative Colorimetric. Click the Printer Preferences button.
4. Select the Advanced tab in the printer properties window. Set the paper you will use (ex. EPSON Premium Glossy). We will print using the Photoshop Elements Manages Colors option you selected in Step 2 so check the box Off (No Color Adjustment) on the right side of the window. Click OK.

5. When you return to the print screen, click Print. Make sure your output paper is dry prior to printing.
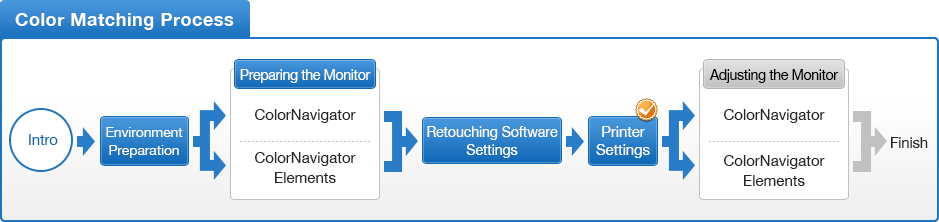
![Once you have successfully printed, return to Monitor Adjustment. Select your desired adjustment software. [Monitor Adjustment]](http://www.eizoglobal.com/library/management/matching/printer/step_07_02.jpg)
 |
 |
- You can use the above map to return to any section of this guide.