Monitor Basics in Plain English
Changes in the Windows 10 Creators Update
- Security
- ATC Resources
- Monitor Basics in Plain English
- Integrated Production – Made in Japan
- Expert Advice – The Best Way to Invest in Your Home Office
- FlexScan EV2795: A Writer’s Extensive Review
- Efficient Telecommuting with a Laptop and Monitor
- What is the Optimal Display for Watching Video? – The OLED Revolution
- Integrated R&D, QC, and Production
- Adding a Touch of White
- HiDPI
- What We Discovered After Trying Five EIZO Monitors in our Editorial Department
- Poor Work Efficiency
- Improve Work Efficiency by Combining an External Monitor with your Notebook PC
- EIZO Monitor Test
- Windows 10 Creators Update
- What is USB Type-C?
- Modern Video Inputs
- Windows 10 Multi-Display Function
- EIZO and Mac – The Perfect Match
- Implementing 4K Monitors
- 10 ways to address eye fatigue caused by displays
- EIZO 4K Monitors – high definition and large screen sizes
- Confused about HiDPI and Retina display? ― Understanding pixel density in the age of 4K
- EIZO Optical Bonding
- How to Address Computer-Related Eye Fatigue
- Pixel Pitch and Enlarged Mode
- Native Resolution and Enlarge Mode
- How can a screen sense touch? A basic understanding of touch panels
- Is the beauty of a curve decisive for color reproduction? Learning about LCD monitor gamma
- Smoother Video with Cutting-Edge Technologies: LCD Monitor I/P Conversion
- Altering color dramatically with a single setting: Examining color temperature on an LCD monitor
- Maximum Display Colors and Look-Up Tables: Two Considerations When Choosing a Monitor
- DisplayPort to D-Sub: The Full Range of LCD Monitor Video Input Interfaces
- The Ability to Display Color Correctly Is Vital: Understanding the Color Gamut of an LCD Monitor
- The Making of a FlexScan Monitor
- Are the response time figures true? A close look at LCD video performance
- The difference in image quality is perfectly obvious! – Let's check the LCD's display
- Making Full Use of the "External" LCD with Laptop Computers
- Videos
- Color Management Resources
- Healthcare Resources
Windows recently released the free Windows 10 ‘Creators Update’ (version number 1703). With this update come a few new and changed features. Read on to find out about some of the changes relating to monitor settings and how to use them.
Original Windows 10 guide here
Display settings
The Display settings menu is the home-base for most monitor related settings. To access this, right click on the desktop and choose ‘Display settings.’ Alternatively, from the start menu click on the gear symbol to open the general Settings menu, and then choose System which will automatically open to the Display settings menu (If not, be sure the Display tab is selected on the left panel).
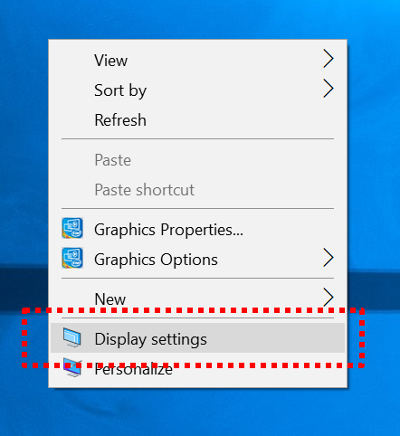 |
| Right click on the Desktop and select ‘Display settings’ |
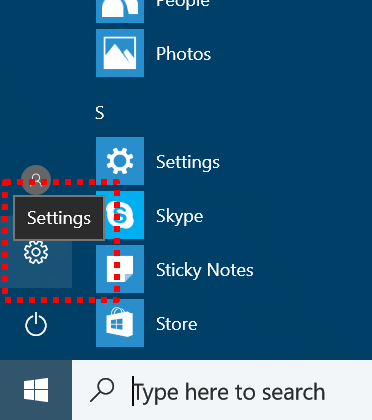 |
| Alternatively click on the ‘Settings’ gear in the start menu |
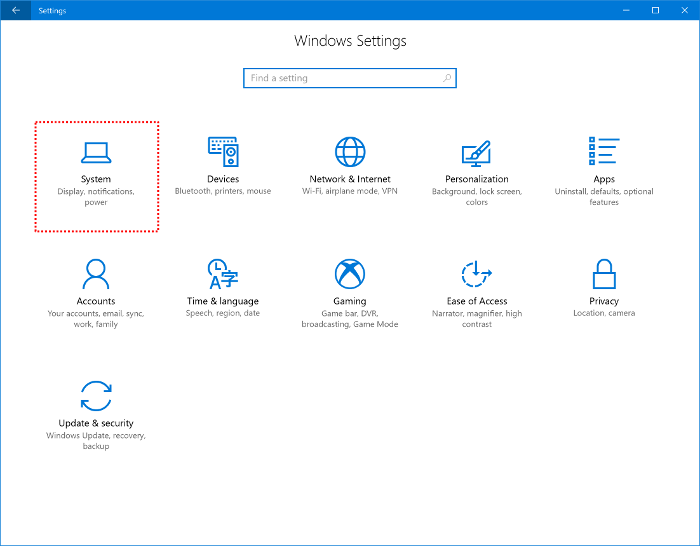 |
| Then click ‘System’ |
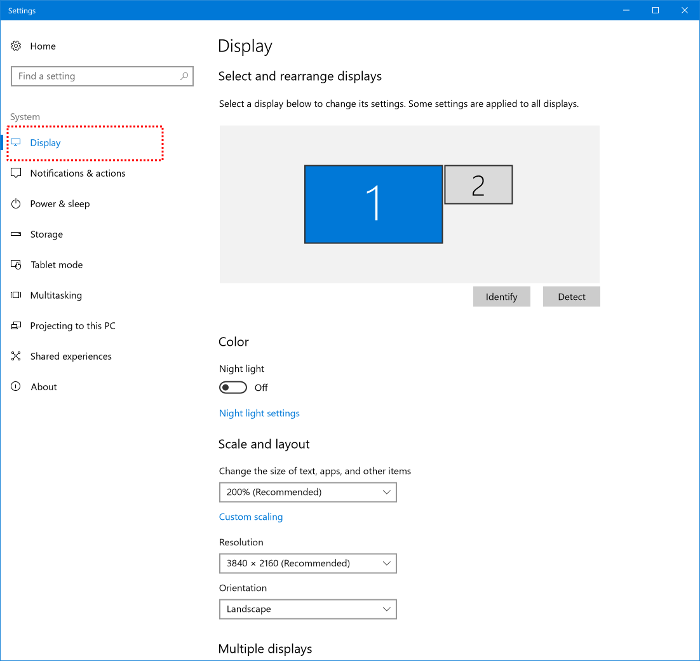 |
| And make sure that you’re in the ‘Display’ tab on the left |
Previously this was accessible via the control panel. From the Windows 10 Creators Update it is no longer accessible from the control panel.
Select and rearrange displays
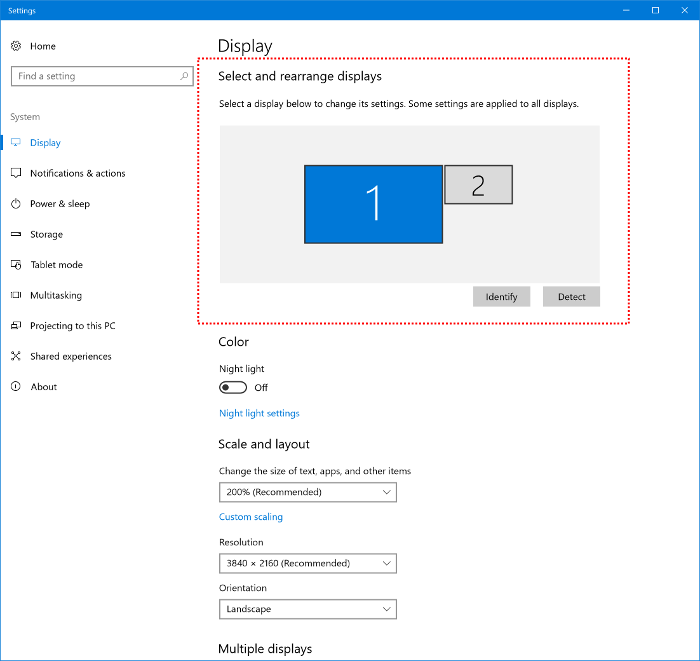
This area allows you to control individual settings of each monitor and change the position of the monitors to match reality. So for example if you have two monitors on top of each other you can drag the 2nd monitor box on top of the 1st monitor box. If you have the monitors side by side, you can place them next to each other. You can also adjust the settings for each monitor by selecting the monitor box and changing one of the settings on the same page.
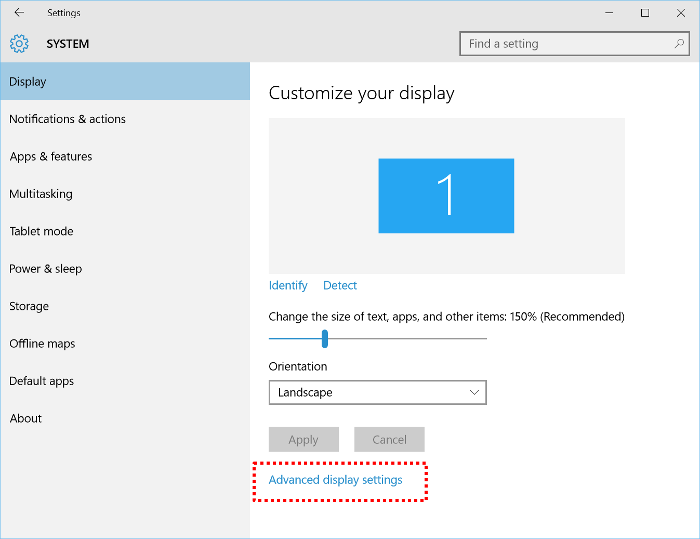
If you change the resolution of each monitor, it will visually be reflected in this menu by changing the size of the monitor’s box. Note that pixel density (DPI) is not represented, so for example even if two monitors are 27-inches, if one is 4K and the other is 2560 x 1440, the second monitor will appear smaller than the 4K monitor. Previously this function was available through ‘advanced settings’ but is now part of the main ‘Display’ menu.
 |
|
Previously resolution settings were found under ‘Advanced display settings’ |
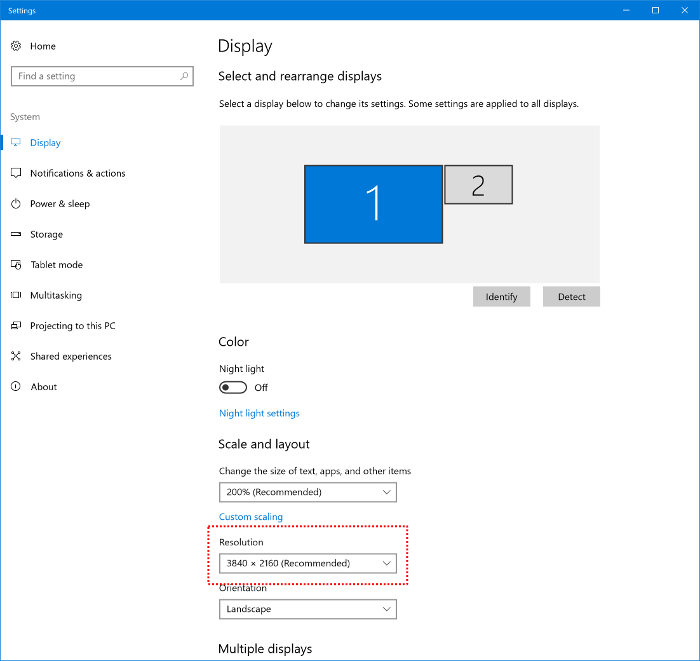 |
| In the Windows 10 Creators Update, it is available in the ‘Display’ menu |
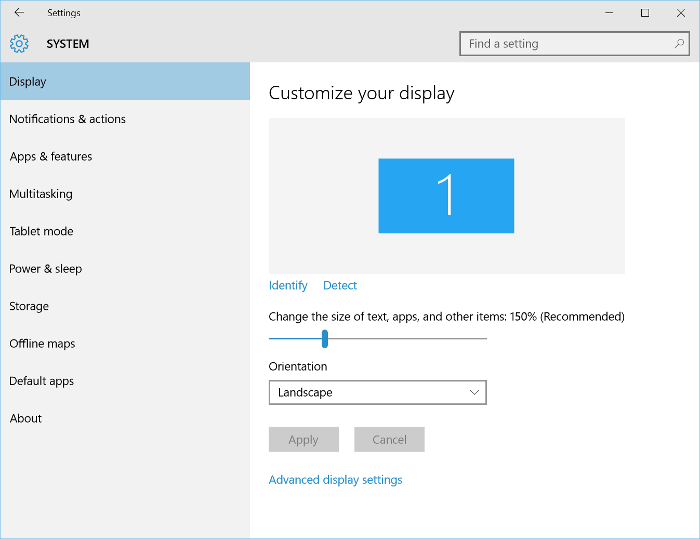
Previously this monitor layout menu was always visible, even if you only had one monitor plugged in. In the Creators Update, this menu disappears when only one monitor is plugged in. If you have two monitors plugged in and the menu isn’t visible, it means that one of the monitors isn’t being detected. Use the ‘Multiple displays’ function to try to detect it.
 |
|
Previously the monitor layout menu was displayed, even if only one monitor was connected |
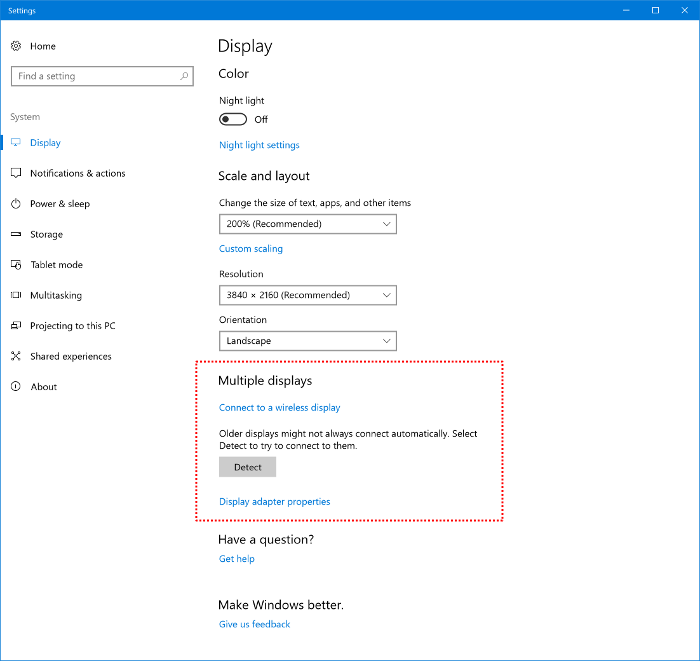 |
| In the Windows 10 Creators Update, the monitor box is not displayed if only one monitor is connected. If your computer can’t detect a second monitor, use the ‘Multiple displays’ function to try detecting it. |
Color
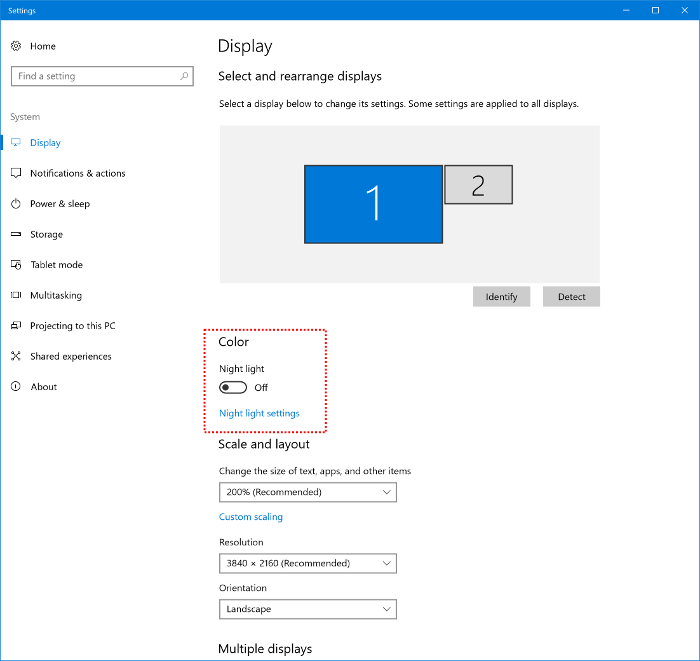
This area contains the ‘Night light’ switch – a new feature in the Creators Update. The Night light is a function that controls the color temperature of your monitor – i.e. whether your monitor is ‘warmer’ or ‘cooler.’ Physiologically ‘cooler’ light is more stimulating to your eyes, and ‘warmer’ light is less stimulating. Therefore continuously viewing cool light can cause eye fatigue and interrupt your internal body clock. To prevent this, some people prefer to use warm light toward the end of the day; mimicking the way the sun sets.
To access the settings for the Night light click on ‘Night light settings.’ In the Night light settings, you can control the color temperature and set a schedule. Control the desired color temperature using the ‘Color temperature at night’ bar. Pulling it to the left will create warm, reddish light, and to the right natural, blue light. You can set the Night light to turn on automatically at sunset and off at sunrise using the ‘Sunset to sunrise’ option, or set a specific time for it to turn on and off. Alternatively you can turn it on and off manually from the Display menu. Note that changing the color temperature will affect color management. Be sure to turn this feature off when color management is required.
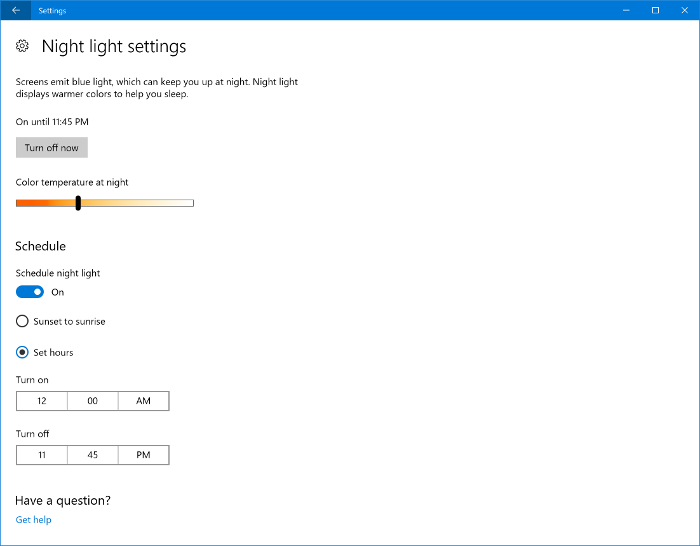
This function is similar to EIZO’s ‘Paper Mode’ function – which changes the monitor to a warmer, easy to read lighting. It is also similar to the circadian dimming function found in the Screen InStyle Software – which allows you to make the color temperature change gradually throughout the day, unlike the Night light which only has the option to change the temperature once per day.
If using this with an EIZO monitor that has the ‘Paper Mode’ function, please note that the color temperature may become very red if Night Light is used in conjunction with Paper Mode (see below). Similarly, if using an EIZO monitor with Screen InStyle – where the circadian dimming function is in use – the feature may clash. We recommend using either only EIZO’s software or only Windows’s Night light, not both.
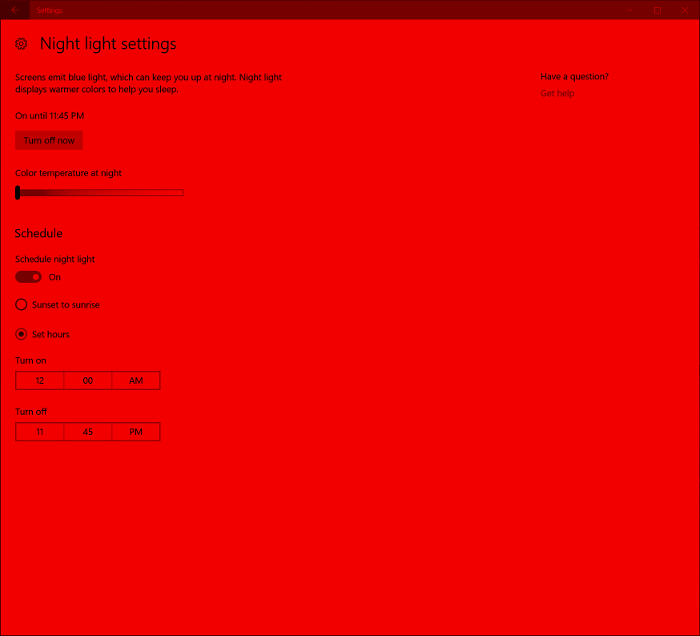 |
| When EIZO’s Paper Mode is used with Night light, the screen can turn red. |
Scale and layout
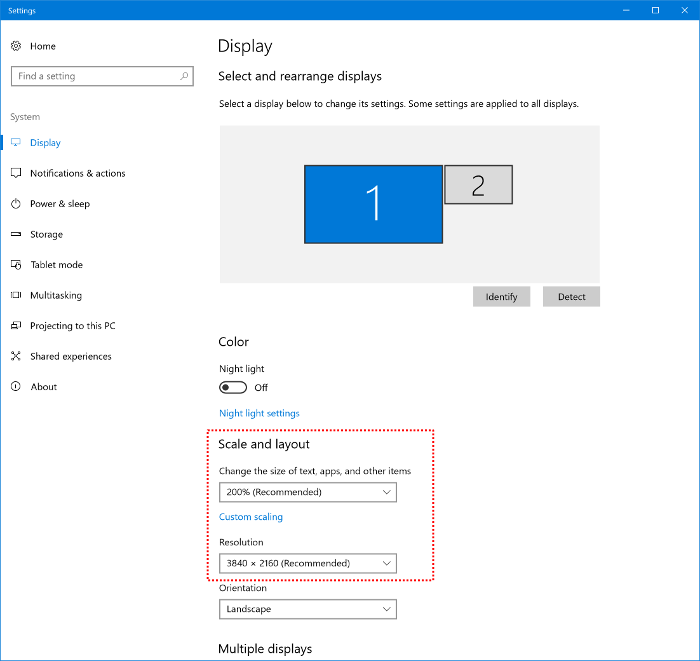
Change the size of text, apps, and other items
This setting allows you to change the size of text, apps, icons, etc. on each monitor. For example, if you have a monitor with a high pixel density (like a 27-inch 4K monitor), viewing text at 100% will create very small text which can be hard to read. Windows 10 will automatically recommend the best viewing setting for your monitor’s PPI, but if you feel the need to change it, this is the place.
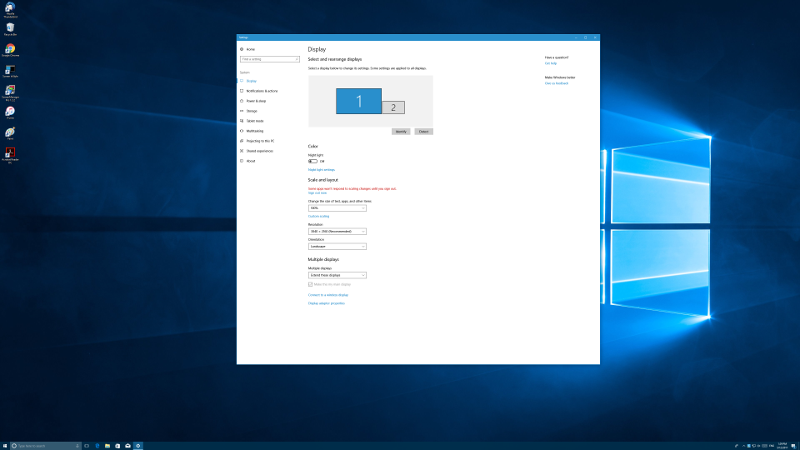 |
|
4K monitor at 100% (icons and text are small and difficult to see) |
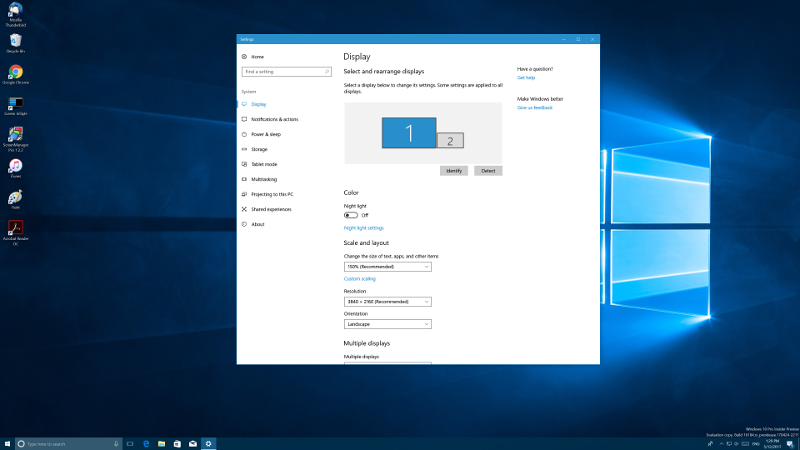 |
|
4K monitor at recommended 150% (icons and text are easy to see) |
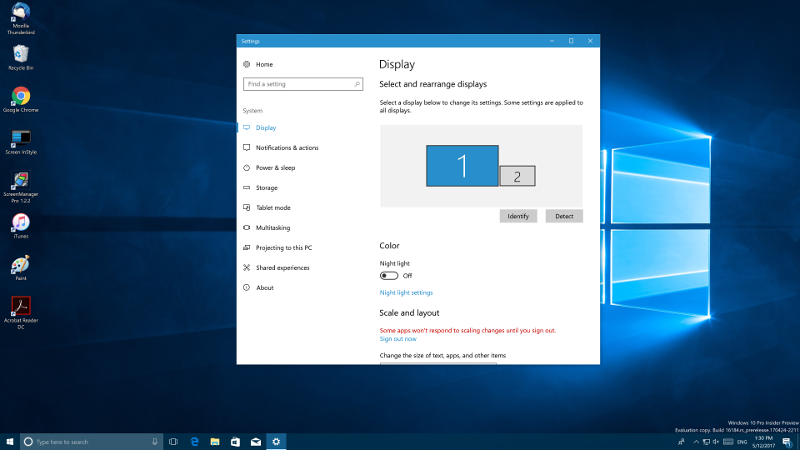 |
| 4K monitor at 200% (icons and text are big. This option is useful for the visually impaired) |
In the example above a 27-inch 4K monitor with 163 PPI is being used. It has a recommended text size of 150% to compensate for the large pixel density.
Previously in Windows 10, the ‘Change the size of text’ setting was a drag bar. In the Creators Update it is a pull-down menu with several percentage options. Choose the option that best suits your eyes. Remember this setting is different for each connected monitor. If you have a second monitor, select the monitor by clicking on its numbered box at the top, and then adjust the text size settings.
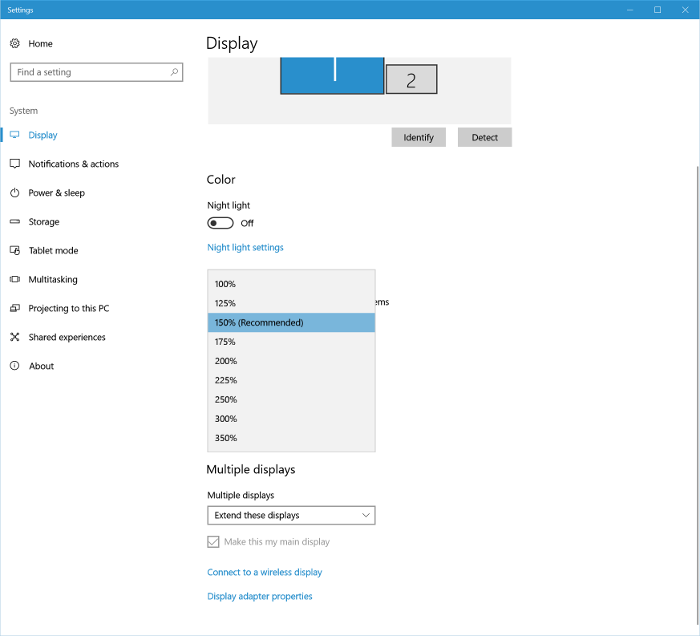
Resolution
The Resolution settings allow you to choose the resolution that you wish to display. Windows 10 automatically detects and recommends the native resolution of your monitor, but you can still change the displayed resolution if you choose.
Previously in Windows 10 this setting was accessible through advanced settings. In the Creators Update it is available straight from the Display menu.
 |
|
Previously resolution settings were found under ‘Advanced display settings’ |
 |
| In the Creators Update, it is available in the main ‘Display’ menu |
ClearType Text Tuner
The Clear Type Text Tuner is a program that has existed for many Windows generations. It is a program that helps to fine-tune how text is displayed through a series of tests; matching it with your own preference. For example, if you find it easier to read bold text, you can use this program to set the system’s text to appear bold.
Previously this program was found in the Control Panel, but in the Creators Update it no longer exists in the Control Panel. To use this program, you must search for it using the search box on the task bar. If you search in the Control Panel, no results will appear.
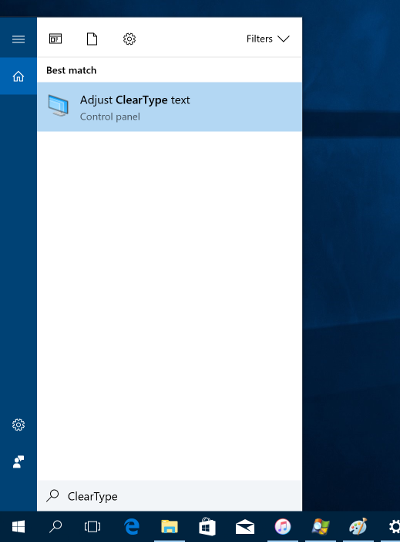 |
|
Search ‘ClearType’ in the taskbar search box |
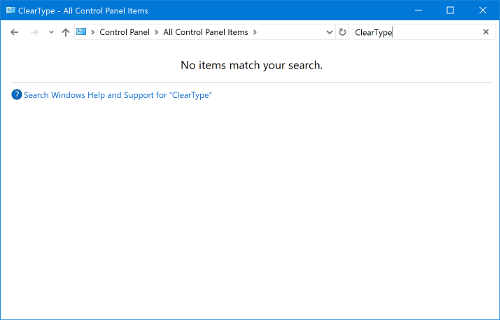 |
| Searching ‘ClearType’ in Control Panel will yield no results |
Apps Menu
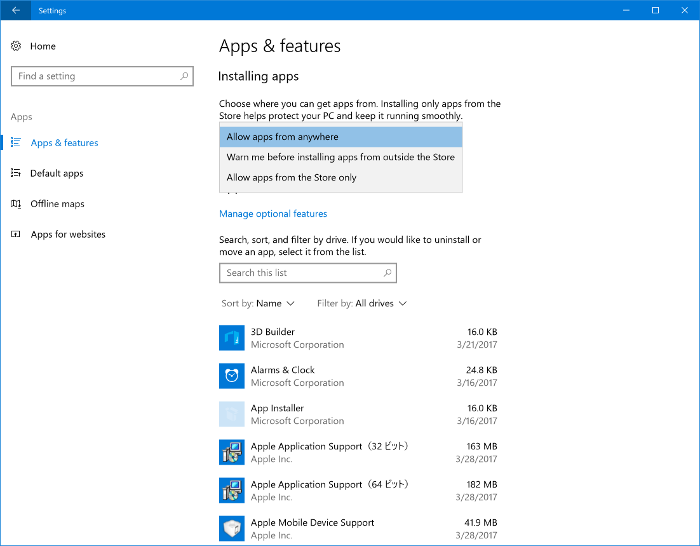
With the Creators Update, all programs and applications have been moved to a specific ‘Apps’ menu. Previously programs and applications could be found in the System Settings.
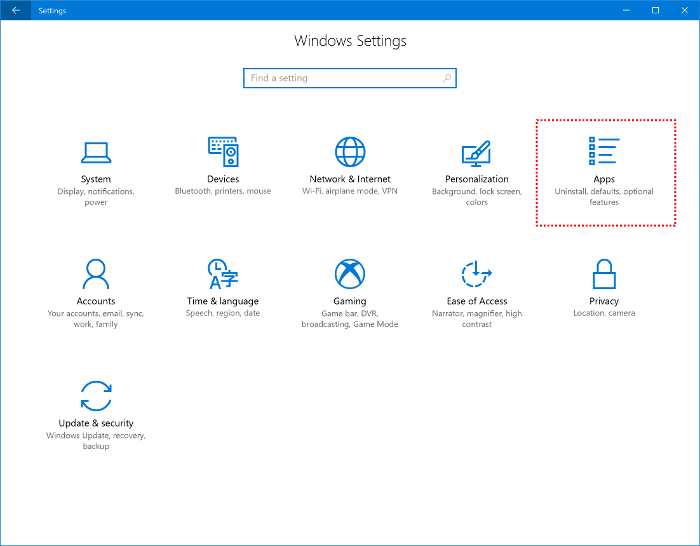
In this new Apps menu, you can choose to select where programs and applications can be downloaded from: from anywhere on the internet (with or without a warning), or only from the Windows Store. This is also where programs and applications can be uninstalled from.
See our guide on using the Windows 10 multi-display function
